About Me:

I am a professional Pet Groomer. I have been grooming for 28 years. This Blog is a kind of diary of my work. I wish I had started years ago, writing some of the experiences I have had while grooming. Most days are fun, some can be sad, some can be just down right crazy. If you are a pet owner and come across this blog, I hope it helps you understand how your pet is groomed. If you are a Pet Groomer, I hope you can relate to some of the stories. Maybe even learn a grooming tip or can leave a friendly grooming tip for me. There is always something to learn, no matter how long you have been grooming.

Wednesday, October 30, 2013

Mild Panic Attack....

.....over a grooming tool.

Not just any tool mind you.
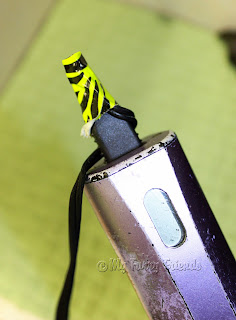
My Bravura!

I have been wanting to buy a second one, just in case my original Bravura dies on me.
It has been acting up lately.
It was no longer holding its charge for more than about 10 minutes.
It was not that big of a deal, because I could always plug it in.

There are several tools that a groomer could not do without.
A brush.
A comb.
Scissors.
My Bravura.

My Bravura, with its 5in1 blade, is a tool that I just can't groom without.
I had been using the #10, #15, #30, and #40 settings on the 5in1 blade for about 10 years.
I have not used my individual 10, 15, 30, and 40 blades in all of that time.
They have been tucked in a drawer for years.
I am not even sure if any of them are still sharp.

That is how much I love my 5in1 blades.

While grooming my first dog today, a St Poodle, my Bravura started to act up.
It seemed to be slowing down.

I had clipped the Poodles face and three of her feet when my Bravura just died.

It died on me!!

But, I noticed that when I moved it around it would pop back on.
A short?
I jiggled the cord, and sure enough, the cord was shorting out.
If I let the cord just fall naturally, no power.
If I held the cord on a certain direction, I got power.


So, out came my trusty duck tape.

I held the cord in place where I got power, and then taped the cord in place.

I finished clipping the feet with no more problems.


Then I bathed and dried the Poodle.

The duck tape worked.
I had power, until I didn't.

My Bravura died on me again!!!!


 Right in the middle of clipping her legs!

Well, the clipper itself didn't die, it just ran out of charge, because the cord had not been charging it right.

The cord died.

No matter how I jiggled it, or moved it around, I just could not get any power.


Time for a mini panic attack.
I was losing the use of at least four blades all at once.
Plus my clip comb attachments, because I only use them with the #40 on the Bravura.

I needed that clipper!!!

I would have to pull out all my old 10, 15, 30, and 40 blades.
I would have had to clean them.
Oil them.
And then test them to see if they were still sharp.

I was in the middle of grooming my first dog of the day.
I did not need this.

I normally hold on to extra parts of grooming tools that are still good when the rest of a tool has gone bad.
I have a small tool box full of blade pieces and screws if I ever need something to fix a blade.
I have held on to old clippers for the parts.

Unfortunately, this was my first Bravura clipper and I did not have and extra cord......or did I?

Did Wahl use the same cord for charging all of their cordless clippers?
Would the cord of one of my old Chromado clippers work?
Had I kept the cord from the old  Chromado clipper?
Before I could go look, I spotted my miniChromado. (that I hardly ever use)

I quickly grabbed that cord and prayed that Wahl used the same cord for each of their cordless clippers.

IT WORKED!!!!! (happy dance)

Only another groomer would understand my relief and excitement.

Not only did the cord work, but I also noticed that my Bravura was back to its normal strength, and was holding the charge again.

Needless to say, I will be ordering another Bravura.
I must have a backup.
Next time it may not be just a fixable cord problem.

So, hold on to those extra salvageable pieces of your old, or broken grooming tools, you never know when they may be a lifesaver. 
I got very lucky today. :)

Happy Grooming, MFF


Tuesday, October 29, 2013

Tuesdays Tip #55 A Product Review

The Sav-Ur-Fur nozzles.

I have gone through so many different sprayers in the past 30 years.
I wish that I had the money back that I spent on all of those sprayers.

For the first few years of grooming, I used a kitchen sprayer.
Yep, that little plastic sprayer that a lot of kitchens sinks have.
I have to say that I am amazed that I got dogs rinsed well with those things.
Boy, did I go through a lot of them.
They don't hold up well to dropping them in the tub, or big dogs stepping on them.

I kind of forgot about using those sprayers till I was at my Vets a couple of weeks ago.
When I went in the back to help him with something, I noticed that he was using one of those small kitchen sprayers in his tub.
Funny how that little sprayer brought back memories.......

Oh, sorry, back to my post.


For years and years now I have been using garden sprayers in my tubs.

I liked garden sprayers because of the different spray settings they had.

I would also only buy the sprayers that had the sprayer control in the front.

 It was easier on the hands to squeeze.

This is the latest sprayer that I had been using.

I really liked it, because the water control was a variable pressure leaver that you pushed up and set, I did not have to squeeze anything.


I really did like that sprayer.
There was just one problem.
Actually there were more than one.
The leaver would eventually get so tight that it was very hard to turn off and on.
Also, the sprayer would start to leak out of a side seam.
I went through several of these in a very short period of time. :(
I really did like that sprayer.


A while back I bought a Sav-ur-fur nozzle.

The one advertized for removing undercoat.

Because the nozzle was adjustable, I was hoping to use it for all bathing.

I did not like it for all bathing.

I felt that it was too powerful for some dogs.


 I thought that this Collie would be a good test for the nozzle.


This is the undercoat of the Collie above.

He had a pretty good amount of undercoat.


 He had been shaved by another groomer a few years ago.

Ever since then his undercoat does not come out easily, even when he is blowing it.


Even though the owner always has me scissor his feathering short and tight, he always comes back in with is rear feathering packed and pelted with mats.

I felt he was a good test for the Sav-ur-Fur undercoat nozzle.


The Collie went straight into the tub.

I soaked him up with Best Shot Shampoo (UltraMax).


Then I started to rinse him with the Sav-Ur-Fur nozzle.

I didn't quite use the nozzle at its full pressure right away.

I wanted to see how it worked at a medium pressure.

I wanted to see if the nozzle would still push out undercoat with a medium pressure for smaller dogs.

I wasn't sure that I would want to use the full pressure on a smaller dog.

The medium pressure did remove undercoat.


I worked in a back and forth motion, aiming the water stream downward to push the undercoat out of the coat.


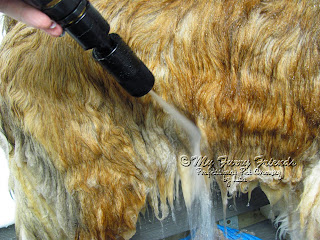
Even at a medium pressure, you can see in the picture, the amount of undercoat that was removed.


After applying Best Shot Conditioner,
 I turned the nozzle to its full pressure for the final rinse.

You can see that it is a powerful, straight stream of water.

Again I worked it back and forth on the coat, pushing more undercoat out.


This is the same rear feathering that is pictured above.

The nozzle not only removed most of the undercoat, but also loosened most of the matting.


The nozzle removed a lot of the undercoat, but not all of it.


As you can see, there is still undercoat in the dog.

This is him after towel drying.


This is the rear after towel drying.

Time to HV dry.


The rest of the undercoat came out with the HV dryer.

The nozzle did help to loosen up all of the undercoat and matting.

The nozzle really helped with this particular Collie.

Most of the time I still have some stubborn undercoat to brush out after the drying, I didn't this time.


I was pleased with the results of this nozzle.

But, as I said before, I did not want to use it as an everyday, every dog nozzle.


So, I ordered Sav-Ur-fur's other nozzle.

The S Nozzle.

I use the quick-connects so that I can switch between the nozzles fast and easy.


The male piece of the quick-connects is attached to each nozzle.


The female part is attached to my hose.

All I have to do is push down on the female attachment to remove and switch between nozzles.

Any hardware store should carry a type of quick-connects in their garden department.


This is a picture of the different heads on the two nozzles.


This is what the S-Nozzle looks like when it is connected to the hose.

I will spare you my sons nick name for this nozzle.

Lets just say that he laughed his a** off when I took it out of the box.

Just think like a 19 year old young man would think and you will know the nick name. :)


This nozzle is also pretty powerful.

Too powerful, when used as is for some small dogs and faces in my opinion.

The pressure pictured here is not even full pressure.


The S-Nozzle is not an adjustable nozzle.

I happened to have an open and close connection attached to my tub hose.
(sorry, I don't know the technical name)


I found that by adjusting the open and close switch, I could control the pressure of the water coming out of the nozzle.


The open and close switch works great for when I want to lower the pressure to rinse faces, or rinse smaller, scared, sensitive dogs.


Tip: When used at full pressure, the water tends to back splash.

I put the nozzle right up against the dogs skin and work through the coat.

It tends to keep the back splash down to a minimum.


Sav-Ur-Fur Nozzles:

             Pros:                                                 Cons: 
~Good pressure                    ~ A little heavy (but I got used to it quickly)
~Easy to handle                    ~ Must be careful with the high pressure stream
~Made well                           ~ Tends to back splash when used at high pressure
~Rinses dog well and fast
~No handle to squeeze
~Price not bad considering 
the numberof other sprayers
that I have bought over 
the years.


I am not a spokes person for this product.
I do not get anything for reviewing their product.
My business bought both of the nozzles.

I do personally recommend these nozzles.
I like them, especially the S-Nozzle.

Oh, by the way, I ordered the purple S-Nozzle from the website.

The nozzle I received sure does look pink to me.
They don't show a pink nozzle on their website.
Considering the reaction that I got from my kids, they think it looks pink also. :(
Oh well, I still like it....even if I do have to listen to my sons nick name for it.  :)

Happy Grooming, MFF

Thursday, October 24, 2013

A First

I have been asked several times over the years if I did Hand Stripping.
I have always told prospective hand stripping customers 'no'.

I learned a little about hand stripping in grooming school.
We spent one whole day on it. :/

For years I never had a customer ask me about hand stripping a coat.
I hand stripped own TerrierX that had a great coat for hand stripping.
I hand stripped her up until she was 17, then the last few years of her life I just let the coat grow.
I felt that she was too old for all of that pulling.

A few of the reasons that I never offered this service is because my knowledge of hand stripping was very limited, it is very time consuming for an average pet groom, and I had no idea what to charge for a such a specialized service.

About six months ago, one of my long time customers, who had recently lost their elderly Wheaton, called to say that they had a new puppy.


 A very cute Walsh puppy.

They brought him in for his first grooming at 8 weeks.

He did really well, but I noticed that he tended to be a bit toothy.

Meaning, he showed signs of being touchy about parts of the grooming process, and didn't mind using his teeth to tell you so.

I suggested that his owners start brushing him, and handling his feet right away to get him used to being fooled with.


His owners were great and did just what I asked.

He came in again for another bath at 14  weeks.

He was really good for some parts of the grooming and a little nasty for other parts, mainly anything having to do with fooling with his legs.

He also liked going after the dryer hose.

For the next four or five weeks his owners brought him every Saturday for a brush out and bath so that I could work with him.


(6 months)

In the meantime, the owners had also gotten a trainer to work with their dog.

With each grooming he was getting better about being groomed.

The owners also put him in doggy daycare.

While in doggy daycare, someone told them that their new Welsh puppy should not be clipped and only hand stripped.

So, they talked it over with me.

I told them what I have always told anyone who has asked about hand stripping, but they were long time customers that I did not want to lose.

I told them about hand stripping. (I have learned more over the years, still not an expert) 
I explained the high cost of hand stripping.
The time involved.
The regular maintenance of the coat.

I also told them that I have groomed (clipped) several Welsh Terriers over the years.
A couple of them did lose a little of their crisp coloring from being clipped, but still looked very nice.
A few others kept their beautiful black jacket even after being clipped.

They took a week or two to decide if they wanted to try the hand stripping, or go for the pet clipping.

They decided on the hand stripping.
I was both excited and a little worried.
Whenever I had hand stripped my own dog, I had always only used my fingers.
I had never used a stripping knife, mainly because I am left handed, and for years could not find left handed stripping knives.

For some reason, about a year ago, I found left handed stripping knives at Hershey and decided to get them.
I am glad that I did, this Welshes coat is so thick.

So, I had a couple of weeks before the Welsh was do in.
I spent that time reading up, and watching a few videos on hand stripping.


I really didn't even think about taking pictures until it was too late.
I was so worried about doing a good job.

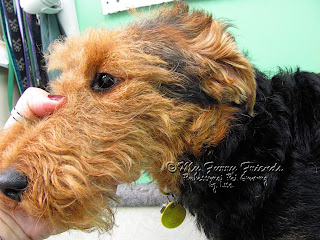
I did take one picture of the Welshes head right before I started stripping it.
Then I forgot to take more pictures during the process.


I hand stripped him in two sessions.
The first session I stripped his head and half of his body.
That was last week.
 
Today I finished him up.
Well, pretty much finished him up.
It is my opinion that you never really finish hand stripping a dog.
I think that they are just a constant 'work in progress'.


So, here he is after I finished with him today.

Don't be too hard on me.

I am not asking for a critique.

I knew that there are things I can improve on.

I am sure that a professional hand stripper would have a list of things to say.


But, the owners are not showing him, and for a pet hand stripping I think that I did okay.


I have to say, more power to those groomers out there that do this all of the time.

My fingers and wrist are so sore tonight.

Thankfully, I will only be doing this every six weeks to keep his coat maintained.

Oh.....he was really great about the grooming. :)

All of that working with him paid off.


Happy Grooming, MFF